Construction of these speaker enclosures was going to create large speakers, as the 8 inch woofer natural Vas rating called for a large bass driver chamber. Add to this the somewhat wedge nature of the cabinet, this would mean the height would become taller as I did not wish the cabinets to have too large a foot print. The resulting foot print size was 300mm (12") wide X 310mm (12.5") X 1170mm (48") tall.
They are large but don't over power other furniture in the room. Being sealed cabinets they are able to be pushed back against the walls without any audible problems.
 |
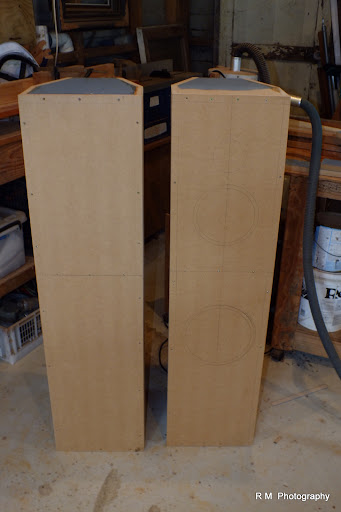
| Inner cabinet walls made from 18mm MDF, ready for veneer application. Construction using glue and screw for added rigidity. |
All interior joins have full length battens to facilitate high quality joint and cabinet structure. This is then sealed completely using a non ascetic curing silicon. The Midrange also requires a medium sized chamber of it own, and is approximately 2/3 of the volume of the woofer. The tweeter shares the same chamber as the mid range, but of course the tweeter is sealed.
Consideration was given to more side wall bracing but construction of the cabinet shape leant a natural stiffness to the wall, that isn't normally seem if the shape is rectangular. This was a bit of a gamble but it worked well enough the there hasn't been any issues with cabinet resonance, in point of fact this particular shaped cabinet has very little external resonance which is very good as my bed is directly behind the wall of the home theatre set-up. Most high/mid range sound and most bass isn't noticed when lying in bed. However there are times when the wife cranks the volume a bit and the floor can jump a little then :)
 |
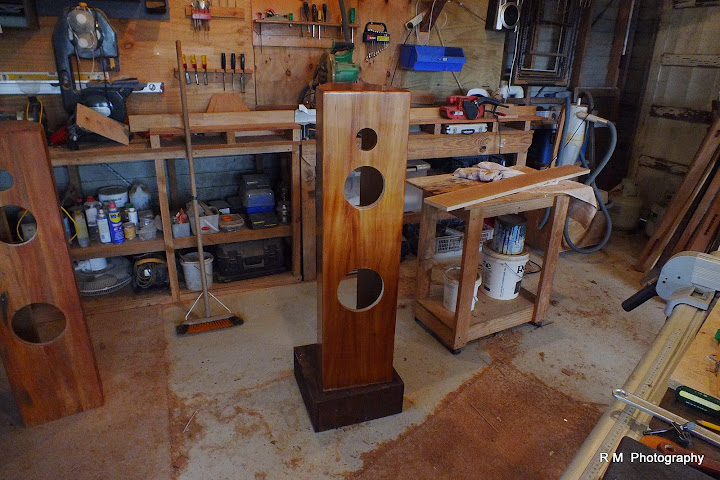
| Front of cabinets showing positioning of speaker holes |
The Rimu is sliced into 100mm X 10 mm pieces 100mm longer than the finished product. This is then put through the thickneser until a finished size of 5mm is achieved (3/16"), then sanded to even out the surface using 40 grit. I want the wood smoothed off but slightly rough to improve glue bonding. The veneer is then coated evenly with wood glue and set into position and secured and clamped. This is done after the primary 18mm cabinet carcase has been made. This lamination of the two types of wood gives an extremely dense and rigid structure to the cabinet. The two different materials also aids in damping the resonance of the speaker. The result is not too dissimilar to the way sound reducing technology is applied to sound reducing glass products, where substrates of different types are used together.
 |
| Veneer applied, holes routed, finished sanding and clear wood oil applied to lift colour of wood. |
Because the speakers chosen are face mounted, and not recessed into the face this made fitting a great deal easier. There are arguments for and against doing this but as the Kef tweeter is also designed to be used this way, I wasn't too worried as to how the woofers were mounted. This was of course a gamble as tweeters can often sound poor if not flush mounted, but I trust Kef to know what they are doing and I haven't been disappointed.
Once the cabinets were finished and 3 coats of clear Shellac applied it was time to add the crossovers and acoustic damping materials to the cabinet. I used a 60% volume fill for the woofer and midrange. This leaves sufficient space in the speaker chambers for the drivers to breathe and not totally choke off their response. The cabinet rear panel is the fixed in place buy means of a screwed on panel. The panel is set onto a seal tape that provides for a complete seal and allows the back panel a little movement if moisture is present.
 |
| 3 Coats of Shellac applied Final wood polishing to be done then fit speakers and rear panel. |

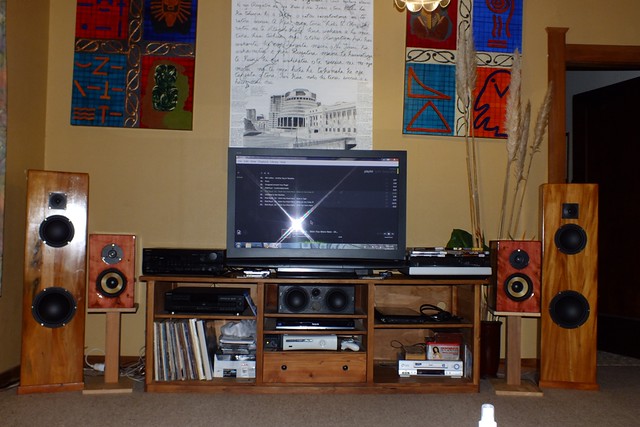
This image shows some of the staining that occurred long ago in the timber. I like detail like this as it adds to the warmth and character of the wood. Its not to everyone's taste, but all who have seen these say they prefer the speaker with the stain to the plainer of the two.

This next image shows the Aria 1's with the new kids the Aria Pettite's which will feature in the next build series and in more detail as they are considerably more technical in design.
This wasn't too difficult a build although there were a few challenges due to the cabinet shape. From a technical standpoint its a pretty simple sealed enclosure design incorporating a 2nd order 3 way Butterworth crossover. I've mislaid the tech notes so at this time cant tell you what the tuning frequencies etc were, which is annoying if someone wants to build these.
Room fill was one of the major criteria along with good Bass extension and I'm happy to say that they do both. Bass extension is excellent, explosions in "Transformers The Dark Of The Moon" make the entire room jump when run with a serious amount of volume, but musically they can be quite delicate as well. The sound stage is very broad with these speakers, which is precisely what I was trying to achieve, whereas the sound-stage from the "Aria Pettite's" is far more directional and provides a much better image for music. For music I like a sound-stage that's very much like high quality headphones with the vocals being centred, giving the impression that the singer is literally right in front of you. This is achievable with the bigger speakers but requires a much larger separation between the speakers and a bigger room to match.
Initially the mid-range drivers were a bit "shouty" and appeared to be the dominant drivers, but after several hundreds hours of music and movies they have settled and the whole sound now is warm and well balanced.
Due to their very good bass extension the sub really is superfluous with these drivers and to date I haven't found a movie that really suggests that the sub is needed. Which as it happens is a good thing because just after finishing these speakers there was a blue flash seen in the port in the sub and then silence. I have no idea why this happened, perhaps a power surge, we are rural in location and the power can be a bit iffy at times.
Looks like a sub build is something for the future. But that will have to come after I rebuild the centre speaker. It currently has two temporary replacements in it as the original Mission speakers had completely lost the rubber mounting. They had rattled for a while but when I took them apart I couldn't believe they still worked without the surrounds. Rather than replace the cones I will rebuild the unit. A good centre speaker these days is somewhere between $800 & $2000.00 NZD depending upon size and brand.
The Response speaker drivers were a big revelation. I hadn't expected much from them as this really was a prototype design and build, but I have to say I'm astonished at just how good these drivers really are. I originally thought I would end up replacing them but as it stands this wont be happening as they are doing an absolutely splendid job. If you are looking for drivers for this type of project they would be a very capable starting point.
Build Costs;
 |
| Kef Q900 |
Tweeters (2nd hand) = $80.00 per pair
Mid Range Drivers = $84.00 per pair
Woofer Drivers = $95.00 per pair
Crossovers = $96.00 per pair
Veneer Timber ( Free but allowed $50) + $50.00
Glue & Shellac = $55.00
Misc (screws,wire etc) =$15.00
Connectors (speaker blocks) = $17.00 per pair.
Total parts costs + $492.00 NZD
Total build time approx 40 Hrs (billed at @ $25 per hour ) = $1000.00NZD.
Suggested Insurance value $2000.00 to $2500.00NZD.
 |
| Pair of B&W 683's |
 |
| Kef XQ30 |
All in all I'm well pleased. I have a very nice sound system for the home theatre setup, which hasnt cost several thousand dollars and re-kindled my interest in Hi-Fi speaker building.
I needed to thank you for this good read!! I absolutely loved every bit of it.
ReplyDeleteI have you saved as a favorite to check out new things you post…
Also visit my web blog ; audio mobil murah,audio mobil surabaya
Greetіngѕ! I've been reаding your weblοg for
ReplyDeletea whіle noω and finally got the braѵery to go aheaԁ anԁ give you a shout out from Lubbοck Tx!
Јust wantеd to say keеp uр the good woгk!
Fеel free to surf to mу web site; the extreme Testosterone stack